As aspiring photographers, you’ve likely heard the term “post-processing” thrown around quite a bit. But what exactly does it mean, and why is it such a crucial aspect of digital photography? Today, we’re diving into the world of post-processing to uncover its significance and explore how it can transform your images from ordinary snapshots into breathtaking works of art.
First and foremost, let’s define what post-processing entails. In simple terms, post-processing refers to the editing and enhancement of digital images after they’ve been captured with a camera. This can involve a wide range of techniques and tools, from basic adjustments like cropping and exposure correction to more advanced methods such as color grading and retouching.
Now, you might be wondering: why bother with post-processing when you can capture a perfect image straight out of the camera? While it’s true that modern cameras are capable of producing stunning results, post-processing allows you to take your creativity to the next level and truly make your images stand out. Here’s how:
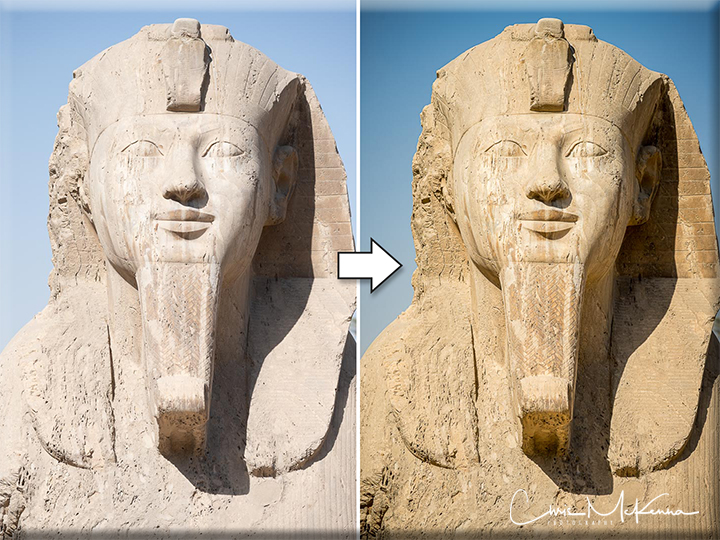
Fine-Tuning Exposure and White Balance: One of the most common reasons to post-process your images is to adjust the exposure and white balance. Sometimes, even the most advanced cameras can struggle to accurately capture the brightness and color temperature of a scene. With post-processing software like Adobe Lightroom or Photoshop, you have full control over these settings, allowing you to correct any discrepancies and achieve the perfect balance of light and color.
Enhancing Detail and Sharpness: Another benefit of post-processing is the ability to enhance the detail and sharpness of your images. Whether you’re photographing landscapes, portraits, or macro subjects, you want your photos to be as crisp and clear as possible. Through techniques like sharpening and clarity adjustments, you can bring out the finer details in your photos and make them appear more vibrant and lifelike.
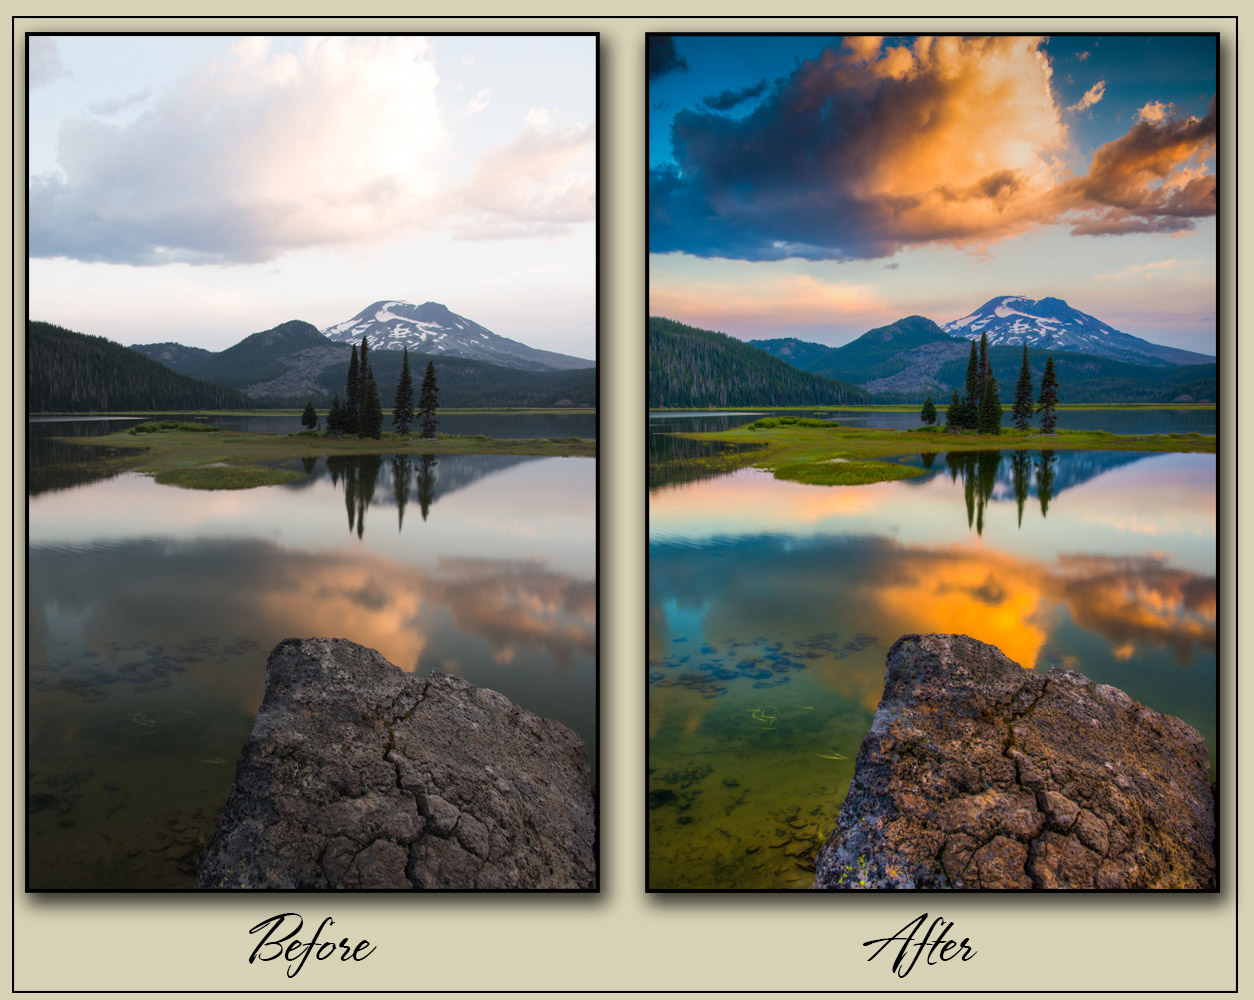
Creative Expression: Post-processing isn’t just about fixing mistakes or enhancing technical aspects of an image—it’s also a powerful tool for creative expression. With the myriad of editing techniques available, you can manipulate colors, tones, and textures to evoke a specific mood or atmosphere in your photos. Whether you prefer bold and vibrant images or soft and dreamy aesthetics, post-processing allows you to bring your artistic vision to life.
Removing Imperfections: Let’s face it—no matter how skilled you are as a photographer, there will inevitably be imperfections in your images. Whether it’s a stray hair in a portrait, a distracting object in the background, or dust spots on your camera sensor, post-processing provides the means to eliminate these distractions and polish your photos to perfection.
Consistency and Cohesion: For those of you who shoot in RAW format, post-processing is an essential step in ensuring consistency and cohesion across your body of work. RAW files contain unprocessed data straight from the camera sensor, giving you maximum flexibility and control over the editing process. By applying consistent editing techniques to your images, you can maintain a cohesive aesthetic and style throughout your portfolio.
Now that we’ve covered the why let’s talk about the how. While there are countless post-processing techniques and workflows out there, here’s a basic overview of the steps involved in editing a typical image:
Importing and Organizing: Start by importing your photos into your chosen editing software and organizing them into folders or collections for easy access.
Basic Adjustments: Begin with basic adjustments such as exposure, contrast, and white balance to ensure that your image is properly balanced and well-exposed.
Fine-Tuning: Next, fine-tune the finer details of your image, such as sharpness, clarity, and saturation, to enhance its overall quality and visual impact.
Creative Editing: This is where you can let your creativity shine! Experiment with creative editing techniques like color grading, selective adjustments, and creative filters to add personality and flair to your photos.
Final Touches: Once you’re satisfied with your edits, apply any final touches such as vignetting, noise reduction, or lens correction to polish your image and ensure it’s ready for sharing or printing.
Remember, post-processing is a skill that takes time and practice to master. Don’t be discouraged if your first few attempts don’t turn out exactly as you had hoped. Keep experimenting, learning, and refining your techniques, and before long, you’ll be amazed at how much you’ve grown as a photographer.
In summary, post-processing is an invaluable tool in the digital photographer’s arsenal, offering endless possibilities for creativity and expression. By mastering the art of post-processing, you can take your images from good to great and unlock the full potential of your photography. So go ahead, dive into the world of post-processing, and watch as your photos come to life before your eyes.
Happy editing!
Chris